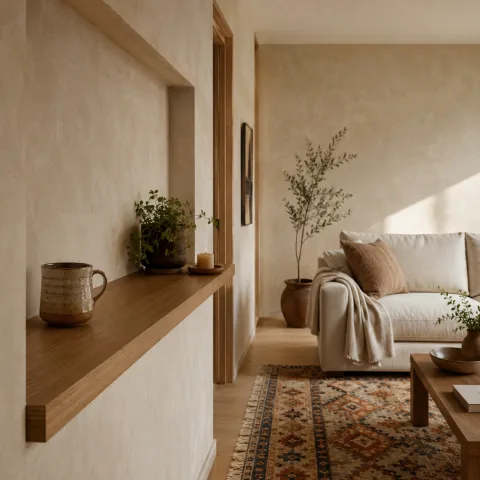
After years of rotating frames and re-hanging prints, we finally settled on a single oak ledge that could bear our wall of memories. We began by measuring the available wall, noting a clean 2,400 millimetre length where the old nail holes lingered as reminders of past layouts. We chose oak for its warmth, its straight grain, and the way its colour would patinate gently with daylight. Our plan was simple: remove the most obvious nails, seal the holes, and let the ledge become the spine for our rotating display. The result needed to feel calm and honest, not crowded or ceremonial.
Planning the oak ledge
We began with a careful plan: a single continuous ledge, long enough to hold three frames, a small plant, and a favourite postcard without feeling crowded. We drafted dimensions on a piece of kraft paper, then translated them to the wall with a pencil line that finally felt straight and honest. We considered the weight of glass and acrylic, calculating a conservative load of 10–12 kilograms for the whole display. We resisted big dramatic gaps and instead looked for a gentle rhythm that would slow the eye as you walk by. In short, the project needed to feel inevitable, not impulsive.
Selecting materials and finish involved more than aesthetics. We selected a straight-grain, 18 millimetre-thick oak board from a sustainably managed mill, planed smooth on both faces and sealed with a low-sheen oil. The finish needed to soften the light rather than glare, so we opted for a white-tinted hard-wax oil that enhances the grain without adding shine. We tested a scrap section beside the door to observe how it would age in our northern light and to judge how the colour would darken with time. We planned for two fixings into studs, using concealed brackets to keep the surface clean and uncluttered. Finally, we prepared a small set of shims to ensure the ledge would sit perfectly level even on an imperfect plaster wall.
 Save
Save
Fitting the ledge: leveling, drilling and mounting
Fitting the ledge required steady hands and a steady pace. We double-checked level with a long spirit level across the full length, then marked the exact positions for two concealed brackets. We drilled pilot holes, inserted wall anchors where necessary, and prepared a minimal set of stainless screws. We worked in a single afternoon, pausing only to wipe dust from the skim of wallpaper and to compare our progress with the mock layout we had saved on the bench. The step felt almost ceremonial, but the aim remained resolutely practical: a surface that could bear weight and still look calm.
We fixed the ledge to the wall with two anchors at roughly 1,000 mm apart, then checked the level again before tightening. A little adhesive was used sparingly to help the hide-away brackets stay flush during settling, but we kept the finish clean and bare. Because our wall is plaster with occasional dings, we used thin shims along the underside to avoid stress points that would crack paint. The result was a snug, non-glaring edge that invites touch and moves naturally as you rearrange the contents. We learned that patience with small adjustments makes a bigger difference than brute force.
 Save
Save
“The right ledge carries the weight of our memories, not the walls.” — Mira
Curating the collection: balance, scale and rhythm
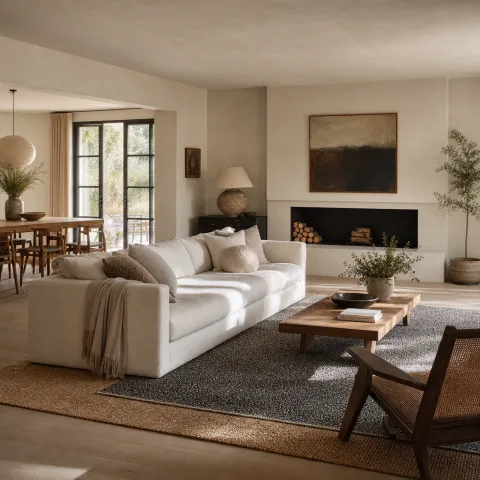
We started with three frames and a postcard, then added a small plant to anchor the eye, while a single figurine gave third dimension. We established a rhythm by varying the vertical and horizontal planes; the eye travels in gentle curves rather than sharp corners. We measured spacing at roughly 8–10 centimetres between items to maintain air in the composition, and we purposely kept the overall block under 1000 millimetres in height to preserve sightlines. We tested rotation on a weekly basis, swapping pieces to see how light and shadow changed throughout the day. The aim was to preserve flexibility without collapsing into a collage, a balance we could live with for months.
Rotation became part of the protocol: once every eight to twelve weeks, we swap items and adjust for the seasons. We used frames of mixed sizes: a couple of 13-by-18 centimetre, a 20-by-24 centimetre, and a tall vertical 18-by-24 centimetre to create movement. We avoided heavy glass on the lighter prints to prevent warping, and kept frames secured with wire or discreet brackets. The shelf’s surface remained clear of dust with a quick wipe every Sunday, a habit that helped us notice when a piece needed re-hanging.
 Save
Save
- Space between items consistently 8–10 cm to keep air around each piece.
- Group odd-sized works in threes for visual tension and balance.
- Alternate vertical and landscape frames to avoid a flat wall.
- Incorporate a small plant or artefact to add texture and colour.
Reflection and long-term use: durability and living with less holes
It has been six months since we installed the oak ledge, and the nail holes behind have faded into anonymity beneath the new line. We wipe the ledge with a soft cloth to remove fingerprints and check for any creep in the level, refining nothing crucial but preserving confidence. The space feels quieter, more approachable for guests, and easier to reconfigure when a mood shifts from archival to current. The absence of repeated hole-making has given us back a physical and mental ground: a shelf that invites deliberate change rather than impulse drilling. We have learned that less can be more when the vertical wall speaks in a softer, warmer voice.
We intend to live with the ledge for years, letting the oak darken slightly and the items acquire their own patina. If a piece becomes too precious or too heavy, we can move it away without patching, simply recollecting the display on a nearby table or shelf. The small maintenance routine—dusting, checking level, and occasionally applying a fresh wax finish—preserves both surface and memory. In our experience, a plain ledge works because it honours the walls we inhabit rather than fighting them. The nail holes that once defined this wall have become a distant memory, replaced by a quiet, functional line.
How to do it
Measuring and planning
We mapped the wall at 2,400 mm and sketched a line, accounting for doorway clearance and furniture underneath, then finalised the ledge length at 1,350 mm.
Selecting materials
We chose 18 mm oak boards, sustainably sourced, with a straight grain and a satin oil finish, and stock of two brackets plus matching screws.
Installing the ledge
We located studs with a stud finder, predrilled, fixed brackets, attached the ledge, checked level twice, and touched up paint where needed.
Curating and hanging
We arranged the frames, tested layouts, and rotated items weekly, documenting changes to track which pieces earned the most quiet rhythm.
Frequently asked
Why did you choose an oak ledge over traditional gallery nails?
How did you fix the ledge to plaster walls without visible screws?
What finishes did you use on the oak?
How heavy was the display you planned to bear?
How long did installation take?
Will this work on older plaster?
Would you recommend this to others?
In closing
Looking back, the oak ledge feels like a hinge between past and present: walls breathe again, and our daily routines become slower and more deliberate. We no longer fear patching up after change; instead we anticipate the quiet process of re-hanging, rotating, and learning what our space wants next. The ledge has taught us to measure once, live with colour and grain, and resist impulse fixes. It is not a statement piece; it is an invitation to reduce friction, without sacrificing character. In the end, ending the nail holes was not just a practical fix but a mood shift that has settled into our rooms.