After a year of living with a bulky oak knife block on the counter, we swapped to a wall-mounted magnetic oak knife strip. The strip is 60 centimetres long, 18 millimetres thick, and finished with a durable tung oil that brings out the grain. We mounted it at approximately 105–110 centimetres from the floor so knives sit at a comfortable height for all of us. In field trials through daily cooking for three adults, the new setup reduced clutter by a third and improved access during peak service. We sanded the oak to 320 grit and applied two coats of oil, allowing 24 hours between coats, before mounting. This report walks through the process, the reality of daily use, and the trade-offs we’ve encountered in the first three months.
Why we chose a magnetic oak knife strip over a block
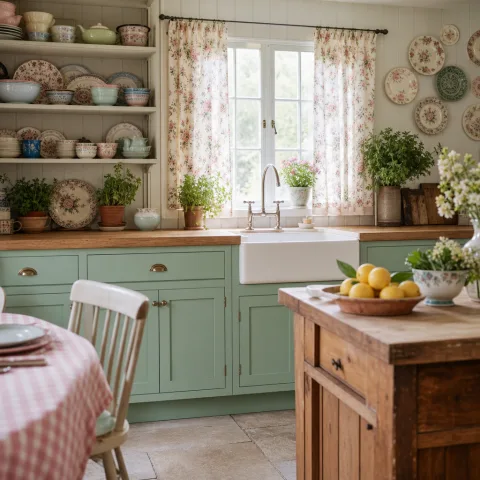
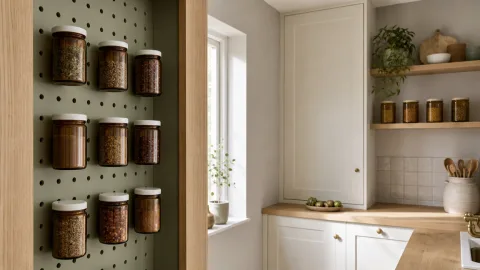
Clutter on the countertop was the first trigger for change, but more important was how we used knives during service. A block takes space, harbours grime, and becomes a fixed obstacle when we move between sink, hob, and prep zone. The strip, being only a slim profile, resolved each of these issues while keeping the knives within arm's reach. We chose solid European oak for its warmth and durability, and we paired it with rare-earth magnets to ensure secure hold for blades up to 25 centimetres. The proven resilience of oak in humid kitchens also meant lower maintenance compared with painted or veneered alternatives.
Seven blades fit neatly on the 60 cm strip, with roughly 9 centimetres between handle ends to minimise clatter. We measured our most-used set—two chef knives, two utility knives, two paring knives, and a carving knife—and arranged magnet positions to avoid collision. The magnets sit just behind the oak face, pulling blades straight onto the surface rather than tipping them outward. This approach keeps the strip looking calm and integrated rather than industrial, which matters when guests pass through the kitchen. The outcome is a refined silhouette that stays visually quiet even when the sun hits the grain just after lunch.
““We learned that a tidy strip aligns with a tidy workflow, eliminating the daily ritual of rooting through a block.”” — Mira
- Plan for seven knife positions and one spare at the far end
- Use a level with a narrow profile to avoid wall glare
- Oil the oak strip before final mounting to seal the grain
- Keep a small silicone bumper at the counter edge to avoid banging knives
 Save
Save
Installation process: planning, mounting, and testing
Preparation began with a simple plan: identify a stud line for secure anchoring, measure height, and confirm wall finish. We used a stud finder to locate solid timber behind the plaster, then mapped a 60 cm strip to align with our dominant work zone. Before drilling, we labelled the position with blue painter’s tape and levelled the layout to avoid crooked mounting. Once the layout was confirmed, we lightly sanded the back edge of the oak strip to improve contact, though we relied primarily on screws for security.
Drilling the wall required careful piloting: we used 6 mm pilot holes for 80 mm wood screws, with two at each end and a midspan support. We inserted two layers of 18 mm backing battens behind the plaster to provide solid bite and to prevent edge pull. After fastening, we checked with a spirit level and tested the joint by applying gentle pressure and a heavier tug with a damp cloth. Finally, we completed a quick wipe-down and allowed the finish to settle for 24 hours before mounting knives.
““We found that a tidy workflow begins with precise placement and secure anchorage.”” — Mira
- Find studs for secure mounting
- Dry-fit the strip before drilling
- Drill pilot holes and drive screws slowly
- Test-load with a full knife lineup before final tightening
 Save
Save
Daily use: workflow, safety, and maintenance
From dawn coffee to late-night dinners, the strip becomes a constant helper in our kitchen routine. Knives are retrieved by lifting straight up and pulling toward the centre, which reduces edge contact with the bench. Cleaning is simple: a damp cloth wipes the oak surface and blades, followed by air-drying to prevent water marks. Over time, we noticed no dulling or warping of the oak, thanks to the tung oil finish and careful storage away from steam sources.
To keep the mounting reliable, we wipe down the magnets every few weeks and check the screws for tightness. The magnets do not interfere with steel knives of decent hardness, and we have observed no magnet migration during daily use. For maintenance, we rotate blade positions every month to avoid edge-to-edge wear on the same pairs, and we store sharpeners nearby for quick touch-ups. In practice, the setup encourages a calmer rhythm at the bench and a quicker retrieval when cooking becomes urgent.
““The strip’s quiet presence makes the workflow feel calmer, not clinical.”” — Mira
- Rotate knives monthly to even wear
- Wipe with a damp cloth after use
- Oil the oak surface every 2–3 months
- Check screws every six weeks and tighten if needed
 Save
Save
Aesthetics, cost, and long-term perspective
From a visual standpoint, the strip offers a lighter, more breathable surface than a block and lets the countertop speak. With the oak’s honeyed grain and the subtle glow of oil finish, the kitchen gains warmth without compromising modern lines. Cost-wise, the 60 cm strip, plus fittings and finish, came in around £120–£150, considerably less than a high-storage block and a full reorganisation. Durability is reassuring: oak handles humidity well when finished, and the magnets stay firmly seated behind the grain.
As we move into the second season, we expect negligible wear if the initial finish is maintained and the screws are inspected. Compared with a block that ages with chips and crumbs in its joints, the strip remains clean and easy to wipe down after cooking. Long-term, we will likely replace magnets after several years if their pull declines, but the oak should last decades with proper care. Overall, the switch has improved our daily routine and left a lighter footprint on the kitchen’s look and feel.
““Simplicity in storage translates to speed in the kitchen.”” — Mira
- Compare total cost with a block option
- Choose a finish that penetrates the grain
- Keep the strip at a height that suits all cooks
- Plan for future expansion if needed
How to do it
Plan and measure
Measure the wall area, mark the intended strip position (60 cm long), set the height to 105–110 cm, and plan for seven knife positions with an extra niche.
Prepare materials and finish
Choose 18 mm European oak, sand to 320 grit, apply two coats of tung oil, and allow 24–48 hours cure before mounting.
Mount backing and drill
Find studs, drill pilot holes, fix a backer batt, level the strip, and secure with screws designed for timber.
Attach magnets and test
Install magnets behind the oak, tighten fittings, test with a full knife lineup, and adjust spacing if needed.
Frequently asked
Will magnets affect knife blades?
How many knives can the strip hold?
Is oak suitable in a kitchen environment?
How do you clean and maintain the strip?
What about safety?
Did the switch affect resale value or future plans?
What is the expected lifespan?
In closing
Choosing the magnetic oak knife strip was not merely a change of furniture but a recalibration of our daily rituals. It tightened our sightlines, reduced clutter, and nudged us toward more mindful cleaning and knife handling. From our three-month field study, the strip has stood up to steam, spills, and daily clatter without warping or misalignment. We learned that a modest, well-made piece can improve speed and safety in ways a larger block cannot. Ultimately, the oak will patina with time, and the magnets will hold fast, reminding us that calm, functional design is worth the small upfront cost.