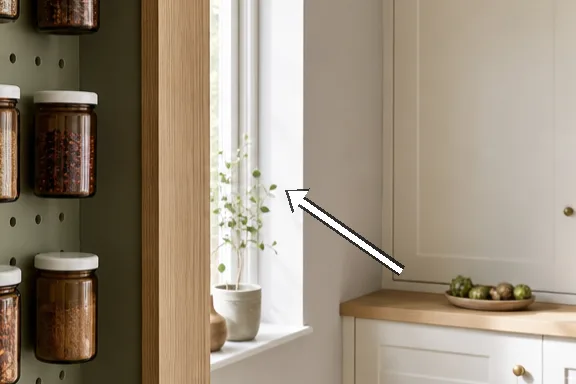
The kitchen has always felt generous in potential but short of clear systems. Our field note begins when a narrow dead space on the internal side of the pantry door becomes obvious. We sketch a plan to fit a 10 by 60 cm pegboard and a handful of baskets. The pegboard promises modularity without adding bulk. We plan to keep the surface tidy with plenty of negative space for growth. The aim is to invite a habit rather than force a routine. By the end of the day we have a prototype that feels both practical and hopeful, a quiet improvement amid daily bustle.
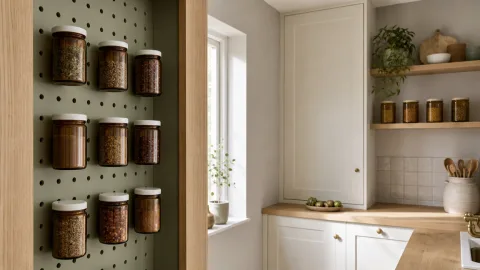
Redefining pantry space with a door-sized pegboard
Jars have long defined the visual quiet of our pantry, yet the back of the door remains a neglected plane. We want a concise grid that respects height, width, and opening clearance. The pegboard promises modularity without adding bulk. We plan to keep the surface tidy with plenty of negative space for growth. The aim is to invite a habit rather than force a routine.
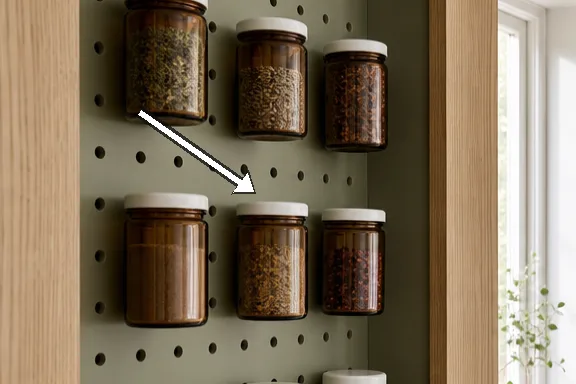
We run the numbers of what can fit: the door's internal flush line, shelf tops, and hinge paths. We sketch a simple 5-by-3 grid that accommodates 15 jars in primary use and several larger tins at the bottom edge. The grid must survive daily use, so we select a board with 8 mm holes and robust hooks. We test with a range of jars from 125 ml to 500 ml to understand balance. The language of the space shifts from random shelf to purposeful border.
We fix the plan into a careful sequence: reinforce the door with a slender batten, pre-drill, and line up each anchor. We use a level and masking tape to settle the grid before drilling into wood. The door opens freely, and the new surface feels secure without vibrations or binding. The first loaded jars reveal both visual order and practical reach. The moment of lifting a bottle from the upper row confirms the concept works in real cooking.
Sizing, mounting and load: the hardware choices
 Save
Save
Weight governs every decision here; a handful of light jars feels different when arranged as a wall of colour. We calculate a plausible total load and plan for occasional top-heavy jars during recipe shifts. We opt for chrome hooks with varied diameters to accommodate different lids and rims. The crowding of jars against one another must not create tipping or friction at the hinge.
We map a grid with six-centimetre spacing centre to centre to keep the surface legible and forgiving. The upper tier holds daily essentials such as salt and pepper, herbs, and a couple of frequently used blends. The mid and lower rows host larger tins and spices that are used less often but still needed within reach. We test weight by loading several jars in multiple positions and watching for deflection.
We choose acrylic bins for visibility and ease of removal, and we rely on small, reliable mounting screws anchored into the timber frame. We avoid metal fastenings that could corrode in humidity and choose a single top anchor to reduce sag while keeping the door's motion smooth. The result is a balanced, modular surface that supports growth without becoming a hindrance. We keep the finish clean and the edges trimmed to ensure no catching on the door frame. The hardware set is deliberately simple, as complexity tends to slow adoption.
We place larger jars on the lower rows where balance is easier to manage, and we reserve the upper shelf for items in frequent rotation. The grid is treated as a living thing rather than a fixed map, so adjustments can be made without dismantling the entire system. We approximate a daily rhythm that suits the family cooking calendar. The initial test proves the door opens without conflict, and jars settle into place with a satisfying click.
Organisation rules: labels, groups and visual cues
Organisation begins with two straightforward groups: herbs and everyday dry spices, then blends and stocks. We experiment with three label styles and choose a simple, legible approach that can be updated without a new system. The grid becomes a reference, not a decoration, so brightness and clarity matter.
 Save
Save
Colour helps the eye scan; amber jars for oils and red for peppers become quick visual cues. A clean sans-serif font on label tape keeps the look calm and durable. We keep the labels at a consistent height to reduce eye movement during busy cooking moments.
One page of an organisation map sits near the door to remind us of the logic: frequency of use, category, and expiry. We revise the map after a first week of cooking and adjust positions accordingly. The goal is to have the system feel obvious and self-correcting rather than a memory test.
“Every spice now has a place, and the door breathes order.” — Mira
Everyday use: tweaking the setup after the first week
The first days illuminate what feels natural and what obstructs flow. We notice jars that are pulled too far from the grid or placed too close for easy grip. We move daily favourites to central positions and re-space the rest for calmer retrieval. Cooking becomes a series of small, reassuring checks rather than a scavenger hunt.
Cleaning and maintenance take on a routine: a weekly wipe, a quarterly tighten, a monthly label refresh. The bins are removed and reloaded with little effort, and jars are rotated to keep contents visible. We test the pathway from worktop to board and ensure nothing requires an awkward reach. The door continues to glide, free of resistance, while the grid remains legible under artificial light.
 Save
Save
Herbs enter the conversation next: we consider a narrow herb rail on the side or a separate top row for loose leaves. We imagine magnetic labels for flexible herbs and a future shelf for seasonal blends. The plan remains reversible and affordable, with the same clear logic guiding changes. After a week, the system feels like an extension of our hands rather than a contrived add-on.
- Use standard 6-8 mm pegboard hooks for uniform load
- Choose clear jars for visibility of contents
- Group by frequency: daily-use spices at the top
- Label consistently with a dial-tone font for quick identification
- Leave a small buffer for future spice additions
Maintenance and future-proofing for spice storage
Maintenance evolves from action to habit; we book a calendar reminder for quarterly checks. We tighten a few screws that loosen with use and we wipe the board to remove oil splashes and spice dust. The surface remains bright and forgiving, a quiet anchor in a busy kitchen. We remind ourselves to swap out jars occasionally to keep midline balance in the grid.
We plan for future spice additions by leaving a spare column and a couple of extra hooks in a labelled box. The map and labels are reprinted when needed and stuck with gentle adhesive tape to keep changes reversible. We consider a small rotation schedule so that seasonal blends do not overwhelm the grid. The approach remains affordable and adaptable.
All of this earns a quiet confidence: a door that feels alive rather than fixed. The pegboard becomes a small system within the larger kitchen ecosystem, easy to adjust during a seasonal menu or when a pantry reorganisation is necessary. We end with an eye for sustainability, choosing reusable jars and minimal waste hardware. The space continues to invite use and reward patience.
How to do it
Prepare the door and board
Before any screws go near the frame, we wipe the surface clean, remove any old adhesives and masks, and measure the internal clearance. We mark anchor points with a level, then dry-fit a slender batten along the door edge to distribute weight. We check the hinge clearance for opening width, adjust as needed, and only then commit to permanent fixings.
Mount the pegboard
We drill pilot holes through the pegboard into the batten and door frame, then tighten screws with a screwdriver and confirm the board remains perfectly flat. We test the weight by placing a sample load across different sections and noting any sag or rebound. The board is level and firm, and the first dozen jars sit in their provisional positions.
Arrange hooks and bins
We thread hooks into a grid aligned with the planned spacing, then clip in acrylic bins and smaller container lids. We load several standard-sized jars to test the balance and grip, moving items to achieve an even distribution of weight. We confirm that the mid-height row remains reachable without over-stretching. We adjust spacing if lids hit or labels obscure labelling.
Label and test
We apply our chosen labels, whether tape, chalk, or a small label maker, and place them in visible positions. We run a couple of weeknight recipes to verify reach, visibility and flow from prep to plating. We notice minor friction points and refine the map to reflect actual practice. We document tweaks so the implementation can be repeated or scaled.
Common mistakes to avoid
Overloading the board
The door is not a deep shelf. If jars are too heavy or too numerous, the board can sag or the door may bind. Plan weight per square metre and stagger load across axes.
Tight spacing and poor visibility
If hooks are placed too close, lids collide and labels hide in shadows. Leave consistent spacing and test with real jars before finalising.
Failing to plan for future changes
A fixed arrangement can quickly feel stale as cooking habits change. Leave room for new spices and swaps and keep the layout editable.
Frequently asked
What is a pegboard pantry, and why use it?
Will this work on lightweight hollow doors?
How do you choose jar sizes and spacing?
What about cleaning and maintenance?
How long does installation take?
Can you adapt this for herbs or tins?
What if you have big spice jars?
Is this cost-effective compared to traditional storage?
In closing
Looking back, the project feels both pragmatic and generous. The pegboard door has shifted how we approach cooking, with a constant visual map guiding choices rather than guesswork. The space once treated as dead now breathes with daily routine. We notice fewer trips to the cupboard and a calmer counter during service. The system invites curiosity: what happens if we swap jars, or add herbs, or shift the top row for new blends? It remains affordable, reversible, and thoroughly repeatable, which matters in our slow-living ethos. And perhaps most of all, it shows that small, well-considered changes can change a kitchen’s mood over time.