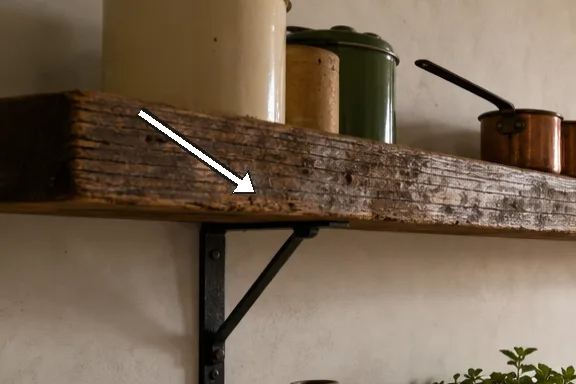
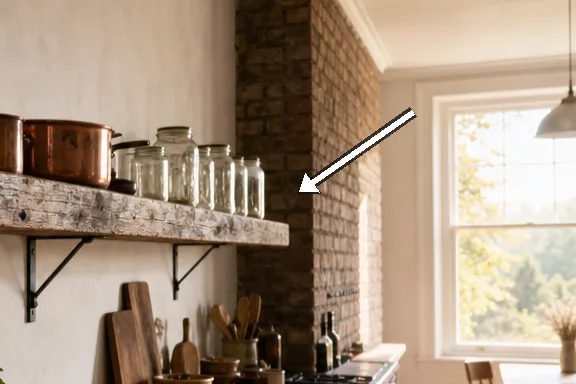
We began with a plan that respected the wall's history and the timber's memory. The kitchen had long asked for a surface that could hold knives, mugs, and moments of quiet. We cleared a narrow strip, leaving the existing hooks intact as a reminder of previous lives on the wall. The scaffold boards we salvaged from a long-forgotten site carried a patina that begged to stay visible. We measured, cut, and sanded with deliberate calm, refusing to rush the process. Each decision was weighted by how it would age with us, not simply how it would look on day one. In slow living terms, this small wall project became a daily ritual of attention.
Audit and alignment on a blank wall
 Save
Save
Cutting, planning and dry-fitting
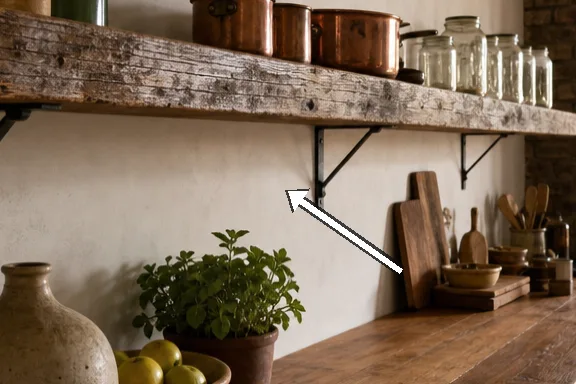
Fixing the rail: level, screws and studs
 Save
Save
“We finally saw the shelves steadied, like a breath held and released.” — Mira
Finish, styling and practical patience
 Save
Save
- Mark stud centres and pre-drill for clean mounting
- Plan weight distribution and use properly rated fastenings
- Seal timber edges against moisture and wear
- Leave space for airflow and seasonal movement
- Keep the shelf light and update with intention
A quiet wall that finally breathes
How to do it
Step 1: Clear the wall and measure
Clear the wall of obstacles and measure the available width and height. Mark stud centres and plan the shelf length to avoid crowding the kettle.
Step 2: Cut and plane boards
Cut the boards to length and plane smooth edges. Sand thoroughly and wipe clean before placing on wall.
Step 3: Mount brackets and level
Pre-drill holes, attach brackets, and level the first anchor. Tighten screws gradually and check alignment as you go.
Step 4: Finish and style
Apply finish to protect the surface, wipe away excess, and let cure. Return items to the shelf with care and observe for any settling.
Common mistakes to avoid
Overloading the board
We packed jars and tins toward the ends and expected the timber to behave. Without checking weight distribution, the shelf bowed slightly, and fixings strained. It taught us to balance loads and extend the shelf life.
Skipping prep work
Rushing to mount without clearing the wall or marking the studs led to misaligned holes. We spent extra time correcting placements and re-drilling, wasting effort and patience.
Inadequate sealing
We applied finish too thinly and did not seal the board edges against moisture. Spill-prone kitchens demand a hardy protective layer and mindful maintenance.
Frequently asked
What tools do I need for this project?
How much weight can the shelf safely hold?
Why use reclaimed scaffold boards?
Is moisture protection necessary in a kitchen?
Do I need a backing board?
How long does this take?
What finish would you recommend?
How can I adapt this for a small kitchen?
In closing
Looking back, the reclaimed shelf is less a DIY fixture and more a small archive of our slow days. We spent time listening to the timber and respecting the wall rather than chasing a perfect Instagram moment. The result is a wall that holds more than cups; it holds memory and intention. Each item finds its place with a gentle prompt from the shelf's edge. The patina remains visible and honest, a reminder that good materials tell stories if we give them space. In future kitchens, we will still plan, measure, and breathe, but now we know how to start with restraint and end with something useful.