The hallway was the apartment’s invisible room — long enough to feel like a corridor, too narrow to be in any photograph, and the kind of place where coats went to be forgotten. One Saturday I measured the wall three times while Mira held a cup of coffee and said, quietly, “it could use something.” The something turned out to be a single brass picture rail mounted about seven inches below the ceiling. It was a deliberate decision to do less; to avoid studious gallery grids and the tiny cathedral of nails that often appears on rental walls. Instead we wanted one steady line to carry small things we loved and swapped often: prints from flea markets, postcards, a child's watercolor, a pressed leaf from a winter walk.
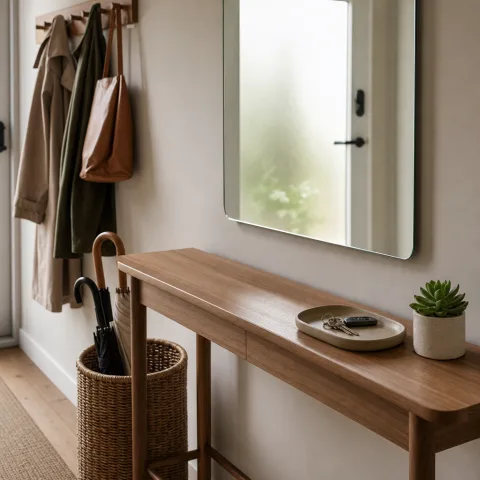
The hallway before the rail
Our hallway ran ten feet long and was just over three feet wide; its only virtue was that it connected the front door to the rest of the apartment without asking any questions. For months we leaned boxes against the shoe cabinet and clipped grocery lists to a magnet on a narrow metal board — none of it felt intentional. The wall had a faint water stain near the skirting and a single scab of an old drywall patch where a framed diploma had once lived. We measured the proportion: high ceilings but narrow width, and discovered an odd benefit — because the wall was tall, a rail placed near the top reads like a horizontal horizon rather than cramped decoration. That felt promising: if we were going to add hardware in a rental, it should read like architecture, not clutter.
The cost of the hallway's neglect was emotional more than monetary. Guests would glance at our living room and then hurry through the corridor; ourselves, we skirted the space. We liked pictures but not the idea of hammering a constellation of holes into a landlord’s paint. The picture rail felt like a compromise: a single horizontal fix that required a handful of screws but rewarded us with the freedom to rearrange without new damage. We imagined changing the sequence for seasons, dropping a plant pod, or leaning a small mirror against the opposite wall while keeping all the hardware intact. It felt like a policy for making a space more lived-in without making it permanent.
Why we resisted a gallery wall
Gallery walls can be lovely, but in a narrow rental corridor they begin to feel like instructions: hang this many frames, stand back, admire. We wanted something quieter, something that suggested rotation. Gallery nails demand planning and a commitment to a composition; a rail offers a looser grammar. We were interested in motion — the ability to slide a print left, lift one frame down, or add a postcard in a few minutes. The rail lets the collection breathe; it accepts mismatched frames, different depths, and the occasional sideways habit we both have of pinning things at slightly different heights. For our hallway, incompletion felt better than overdesign.
A small decision with outsized returns
Mounting the rail took a single afternoon and a modest outlay; the returns have been daily. It changed how we leave and enter the apartment — now we notice the way light moves along the brass, the tiny shadows of frames, and we have a place to stick small, temporary things without wondering whether they’ll need a hammer tomorrow. That modest investment is the kind of slow-living trade we believe in: spend on something that improves ritual and repairability, rather than on the latest disposable decor trend. The rail is forgiving, cheap to maintain, and, crucially, uses materials we can rehome when we move out.
Why a single brass rail makes more sense than a dozen nails
Brass reads as an intentional material in a hallway the size of ours. It isn’t the cheapest option — plastic picture rails exist — but brass has weight, patina, and a forgiving shine that looks intentionally old rather than anonymously new. We chose a narrow profile, about 12 millimetres tall with a flat face, because it casts a thin shadow that helps separate the rail from the wall without shouting. The decision to go with a single strip rather than a double row or staggered rails came from wanting a single organizing line: everything hangs from it, so our eye learns to read a single cadence down the corridor. One line also simplifies mounting: fewer holes, fewer potential landlord complaints.
We considered darker metals and painted rails. Black steel would have felt sharper and more contemporary; brushed aluminum was a budget-friendly alternative. Brass, though, offered warmth that worked with our limewash walls and the old walnut frames we kept reaching for at flea markets. It tolerates fingerprints and develops a gentle patina; fingerprints make sense as proof that someone passed by. Choosing brass was less about being precious and more about pragmatics: the finish is durable, easy to polish, and — if we needed to remove the rail before a move — the holes left behind read as a single, discrete scar, not a confetti of nail marks.
Scale and profile matter
The rail’s proportions decide whether it reads as architecture or as ornament. A chunky cornice rail would have overwhelmed our narrow passage, while a hairline strip might disappear. We landed on a modest midline: visible enough to be read at arm’s length, subtle enough not to frame the room. Practical considerations influenced the profile too: the channel must accept thin S‑hooks and a small loop of cord without binding, and the front face should allow for a tiny lip so hooks don’t slip sideways when bumped. These small measurements — the lip depth, channel width — were the difference between a rail that felt provisional and one that felt permanent.
Cost and where to source
We priced rails from a few suppliers. Branded picture-rail shops sell polished sections by the meter; salvage yards occasionally have reclaimed rails that come with character but also dents. For our build, we bought a new brass section, about 2.5 meters long, which cost a modest sum and came with end caps. If you’re on a budget, consider a narrower brass scotia molding repurposed as a rail — it won’t have a channel but can be adapted with exterior S‑hooks and an inconspicuous bracket. Factor in small extras: screws for masonry or drywall anchors, a couple of hand clamps, and the cost of S‑hooks and cord. In the end the whole project was under a long dinner out, which felt like the right scale for a weekend upgrade.
Choosing hardware and the small tools that matter
A picture rail is only as good as the fasteners holding it up. For our wall — plaster over lath in places, drywall patches in others — we chose metal anchors designed for medium loads and short screws that sat flush with the rail’s back face. We used a stud finder once to confirm a couple of screw positions but otherwise relied on good anchors; the rail is light but frames add dynamic load, especially when people brush past. The right anchor gives confidence. Cheap plastic plugs are fine for very light loads, but they wobble and make the rail feel provisional. We wanted the rail to read like an architectural detail, so we invested in quality brass screws and matching plated washers.
Our toolbox for the afternoon was small: a cordless drill with a clutch, a set of masonry bits and a pilot‑drill set, a torpedo level, a tape measure, a soft pencil for marking, and two quick‑grip clamps to hold the rail during drilling. We borrowed a long spirit level when we realized the rail needed to be visually straight over its entire length rather than locally level at each bracket. The clamps were the unsung heroes: they allowed us to align and hold the rail while one person drilled and the other steadied. There’s a temptation to think you need a lot for a simple job; really, a careful hand, decent bits, and a level make the difference.
Anchors: which to use where
For plaster we used comb‑type anchors that spread behind the wall; for the patched drywall sections we used self‑drilling metal anchors rated for medium loads. If your wall is masonry, tapcon screws are the reliable choice. The key is to match the anchor to both the wall substrate and the expected load: a cluster of frames will multiply the effective weight at one point. We spaced fasteners roughly every 30–40 centimetres and always placed one closer to the ends to prevent the rail tipping when pushed. If in doubt, err toward more anchors — they add a few minutes and a negligible cost, but offer future peace of mind.
Tools to borrow, not buy
We borrowed a long spirit level and a set of clamps from a neighbour which kept the budget sensible. If you don’t foresee many home projects, renting a tool kit or borrowing from a friend is perfectly cromulent; the cost of a good drill is often more than the project’s worth. A small investment we recommend buying is quality drill bits — a blunt bit will wander and scar your wall. Also, buy S‑hooks that are solid metal, not the thin stamped kind that bend when nudged. The difference in handling is immediate and makes the installation feel thoughtful rather than makeshift.
Measuring, marking, and the spacing that makes things breathe
We had six small frames to hang and we wanted even negative space between them. A simple mistake is to measure from frame centers rather than edges, which leads to crowding at one end. Instead we measured the total length of all frames plus the desired gaps, then centered that grouping on the wall. For example: six frames averaging 18 centimetres wide plus five gaps of 6 centimetres equals the total run; subtract that from the rail length and divide the remainder to find the outer margins. This arithmetic takes five minutes and saves hours later fiddling with spacing. It also makes the finished arrangement feel intentional rather than improvised.
We marked the rail with small pieces of painter’s tape instead of pencil so that if we needed to slide a hook a millimetre we could, without wearing the brass. Another trick: mark the exact cord length each frame needs when hanging in its eventual spot, and clip a temporary clothespin to hold the cord while you step back. Small frames look best when their centers land between eye height and slightly below, but in a narrow hallway you must account for passersby — keep the lowest edge high enough the frames won’t be accidentally grabbed. Our decision to keep the rail high solved both aesthetics and practicality: nobody bumps into the frames, but they’re still in the line of sight.
Marking tips for perfect alignment
We used a long level to score a faint reference line on the wall for eye alignment and then translated that to small tape marks on the rail itself. If you drill into the rail first, it becomes harder to shift later; instead, hold the rail against the taped marks and drill through into the wall, using the rail as your template. That way the holes line up perfectly. Also, mark every intended screw location on both the wall and the back of the rail before you start; it prevents the half‑panic shuffle when the drill bit wanders and you’re suddenly two holes off center.
Working around trim, doors and sockets
Our rail had to clear a door frame and a high electrical socket; the solution was simple: plan the run as a composition rather than a straight arithmetic problem. Shift the grouping a few centimetres so the frames fall away from the door swing and the sockets. If a door interrupts the run entirely, terminate the rail before the trim and place a complementary smaller rail on the other side for balance. These pragmatic compromises keep the installation polite: the rail should belong to the room, not fight the architecture. Conserving symmetry is less important than ensuring frames don’t get slammed by doors or block utilities.
Mounting the rail: how we did it in one afternoon
We started by predrilling the rail where the screw heads would sit to avoid splitting the profile when driving screws. With the rail supported on clamps and a friend holding the level, we drilled through the rail into the wall at the premarked points, then removed the rail briefly to insert the anchors, and finally fastened the rail back in place. The process took discipline: measure twice, clamp once, drill carefully. The brass I chose had a shallow back channel which accepted the screw heads without them sitting proud; that small detail made installation neater and the rail less likely to rattle when bumped.
We used a slow, low‑torque approach when driving the screws to avoid distorting the rail. A common mistake is to overdrive too quickly; the metal bends, the holes open up, and the line becomes wobbly. Instead, set the drill clutch low and finish screws by hand for the last few turns. If your rail has end caps, fit them after the rail is mounted so they hide any uneven screw spacing. We also practiced on a scrap piece of metal to feel how the brass behaved under a countersink and to choose the right driver bit size. That practice saved a little sweat and a lot of fretting when we began on the wall itself.
Protecting the finish while you work
Brass scratches easily if you’re not careful, so we kept a scrap cloth under our clamps and used painters’ tape on the rail where pliers made contact. If you need to flatten a burr, do it lightly with very fine steel wool and a directional rub — the patina should look lived‑in, not hacked. For an almost-new gleam we used a tiny dab of brass polish after installation, applied with a cotton cloth and buffed gently. The intention is not to make the rail look factory perfect, but to remove obvious tool marks that will bother you every time you walk past.
A note on landlord relations
We told the landlord in advance and framed the project as reversible and neat; that honesty made the small exchange cordial rather than defensive. If you’re nervous about permission, choose anchors that leave the smallest possible hole or plan to fill and limewash the wall before moving out. Photographs of the installed rail sent ahead of time often reassure landlords — they can see the discreetness of the setup and how tidy the holes are. Being upfront also deters last‑minute panic over 'unauthorised alterations' and builds goodwill for the day you decide to remove the rail and leave the wall better than you found it.
Hanging prints: S‑hooks, cord, and the pulley we kept
We hung our six small frames using solid S‑hooks and a doubled loop of cotton cord. The frames have D‑rings at the back, and the S‑hook passes through the ring and into the rail channel, allowing infinite lateral movement. What transformed the process, though, was a tiny pulley at one end of the run. Instead of lifting frames up to the rail each time, we attach a short cord to the S‑hook, drop the frame to a comfortable height, and use the pulley to raise and lower the cord. It’s a small labor save, but it turned changing art into something leisurely rather than an awkward balancing act on a step stool.
S‑hooks vary. Buy ones that are thick and have a slight curve so frames don’t pop off when brushed. Thinner stamped S‑hooks bend; after a few months they feel cheap. We also used a single strand of linen cord knotted neatly through the frame’s D‑ring. Linen is quiet and wears well. For the pulley we used a small brass block with a sheave the size of a large button and anchored it into the wall near the rail end. The cord passes through and wraps onto a tiny cleat; pulling on the loose end lifts any frame attached to the moving S‑hook. It’s the kind of small machine that makes housework feel tidy.
Why the pulley trick matters
The pulley is partly practicality and partly theater. Practically, it prevents repeated climbing and awkward lifting; aesthetically, it makes the act of changing art feel slow and deliberate — a small ceremony. We found ourselves swapping seasonal postcards because it was so easy to drop a frame to eye‑level, replace the image, and raise it again. The pulley also keeps cords tidy: when a frame is up, the spare cord wraps neatly around the cleat and tucks out of sight. It's a tiny invention that encourages use, and we’ve learned that systems that make maintenance easy actually get maintained.
Small choices that improve longevity
We sealed the cord ends with a dab of wax to prevent fraying and chose hooks with a slight inward bend to stop frames slipping. If a frame is heavier than the rest, place it nearer the supports; avoid grouping three heavy frames in a single cluster. Keep spare hooks and a bit of cord in a small drawer near the front door so swapping takes minimal effort. These small preparations prevent improvisation that leads to damage — a bent frame, a twisted hook, a scratched rail — and make sure the installation remains a habit rather than a decorative lottery.
Styling six small frames so the whole feels intentional
We resisted the urge to match every frame. Instead we gathered a handful of small frames — two thin black, two narrow walnut, and two painted white with slightly worn edges — and mixed prints that shared a limited palette: umbers, muted blues, and a touch of ochre. Limiting the tonal family allows mismatched frames to read as a composed set. The spacing between frames is consistent; the differences in frame width and matting become texture rather than discord. The result feels curated in a domestic way, not like a showroom. The rail encourages quiet variety: you can swap one image for another and the whole reads as a deliberate edit rather than random clutter.
One small composition rule we love is the odd number: three or five objects feel balanced; six can feel formal, but because we kept generous gaps the run reads more rhythm than regiment. We placed heavier visual weight — a darker print — near the center to anchor the grouping and allowed lighter images to breathe around it. If you prefer symmetry, mirror the frames across the center, but in a narrow hallway we favour gentle asymmetry: it rewards repeated viewing. We change one print every few weeks, often a postcard found on a walk, and the set feels like an ongoing conversation.
Mixing frames the lazy way
If matching frames feels like an ordeal, use mats as a unifying device: the same off‑white mat ties different frames together visually. Another lazy trick is to standardize the hanging height of the print inside its frame so the top edges don’t fight one another. Small frames look grown‑up when corners line up subtly across a run; little things like shared margins and consistent mat widths make variety feel curated. The rail tolerates these small inconsistencies and rewards the effort with a display that feels both comfortable and deliberate.
A list of small styling moves
“The rail made switching art feel like flipping pages, not redecorating an altar.” — Mira
Living with the rail: polish, patina, and the small rituals
The rail has become part of our daily rhythm. Once a month we dust along its length with a soft cloth and check the cleat so the pulley cord stays tidy. Brass will develop a patina in places your fingers touch; we treat that as character and leave it alone unless the darkening becomes awkward. When it needs it, a light polish with a small cloth removes sticky cooking grease or obvious fingerprints. The maintenance is minimal and private — unlike a painted gallery wall that demands repainting when it scuffs, the brass hides a lot of small sins and benefits from the odd gentle rub.
We also keep a small ‘swap kit’ nearby: a spare S‑hook, a couple of lengths of cord, a tiny screwdriver and an extra cleat. It sounds fussy, but when a frame needs a new hook or the cord frays, we replace it in two minutes while coffee brews. Habit matters: systems that are easy to maintain get maintained. The rail encourages quiet adjustments — we nudge frames by feel, we rotate prints with the season, and the hallway continues to feel like a lived place rather than a static design installation.
When the rail shows its age
If the brass darkens unevenly, a gentle clean evens the tone. But often the slight difference between fingers‑touched shine and soft patina is what makes the rail warm. When we eventually move, the rail will likely come with us or go to a new owner; either way, it will be easy to remove and to fill the tiny holes left behind. The idea was never permanence but rather stewardship — put something good on the wall, care for it, and when the time comes, pass it on. That’s the opposite of throwaway decor and precisely the kind of slow-living decision we like.
What to do when you want to change the language
If you tire of the six small frames, consider shifting to a single larger work or adding a shelf beneath the rail for small objects. The rail is a grammar, not a cage — it should help you experiment. Try rotating one print every week for a month and see what combination resonates; often a small change refreshes the whole corridor. If you decide to take the rail down, do it gently: unscrew the heads, fill the holes with a little spackling or lime putty, and touch the area up with a thin wash of paint. Leave the wall better than you found it, and you’ll have one more nice conversation with your landlord when you move out.
How to do it
Measure and mark the rail run
Calculate the total width of your frames plus desired gaps, center that run on the wall, and mark the rail positions with painter’s tape to protect the finish.

Clamp and predrill the rail
Support the rail with clamps, predrill through the rail at screw points into the wall as a template, then remove the rail and insert anchors appropriate to your wall type.
Fasten the rail and check level
Return the rail, secure with screws using low torque, and finish the last turns by hand while a partner holds a long spirit level to ensure visual straightness.
Hang frames and set cord lengths
Attach S‑hooks to frames’ D‑rings, set a cord length that places the frame at a comfortable height, and use the pulley to raise it into position.

Frequently asked
Will the rail damage the wall more than nails?
Can I use the rail on thin plaster walls?
What is the weight limit for frames on a brass rail?
Is the pulley trick necessary?
In closing
Walking the hallway now is like reading a short poem every morning — the rail is a line of punctuation that organizes the small things into a steady sentence. The rule we learned is simple and moral: invest in the hardware and build the system, then keep your hands off the frames until they ask politely to be changed. The pulley cord, the S‑hooks, the small gaps between frames — those little choices make swapping cheap prints feel ceremonious. If there’s one image to leave you with, picture the brass strip gleaming faintly at head height, a single band that encourages curiosity without shouting. It’s the kind of quiet improvement that ages well, and in a rental, that’s the point.