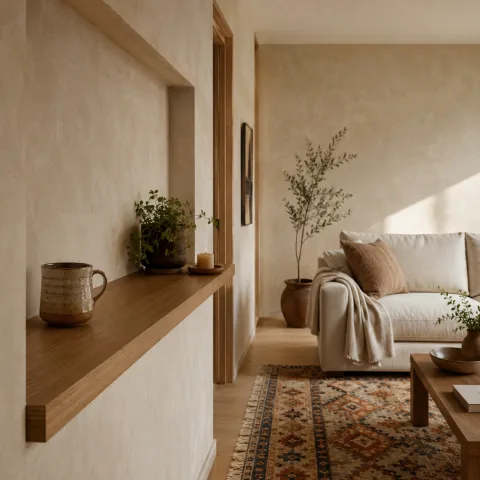
The table’s wobble revealed itself slowly. One evening a cup of tea slid an inch toward the edge and stopped — not because the table was clever, but because the loose rear leg had found a new resting angle. It was nothing dramatic: a single tabletop and three solid legs, a fourth that traced a shy arc when nudged. The table is a 1960s piece we found at a market for the price of a secondhand lamp and a story. We could have replaced it with something cheaper, something perfect and new, but the wobble felt like an invitation rather than an offense. There’s a small, stubborn pleasure in testing whether an object is worth the work of being kept. We re-glued that leg with hot hide glue, used masking tape as a makeshift clamp, and balanced a heavy book on the joint while it set. Six months later the table still lives where it always did — often with coffee and keys on top, sometimes holding a half-finished project — and it has taught us more about small repairs than a weekend of browsing online furniture stores ever did.
A wobbly leg and a Tuesday
The wobble began as a mercy. We left the table at the market because it was cheap and the seller insisted the finish had “character.” At home, the rear-right leg refused to remain steady when the table bore anything more than a paperback. The first time a glass rattled I measured the movement with my fingers: a millimetre here, a fraction of an inch there. It wasn’t a clean joint break but a slow betrayal—old glue that had dried brittle, a peg that had loosened inside an end grain. The wobble was honest about its needs; it required a re-adhesion rather than a replacement. That kind of diagnosis is useful because it narrows the options. Once you know the failure mode — joint not wood — you avoid buying new furniture you don’t need.
We had little time that week. A Tuesday evening, a pot on the stove, and the kind of domestic slack that allows small experiments to happen. The tools in reach were a putty knife, a jar of cheap masking tape, a small block plane I use for trimming corner joints, and a book the size of a brick. There is a modest, moral economy to weekend repairs: you’re asked to spend your hours and attention where the payoff is clear. The payoff here was immediate utility. We weren’t trying to restore a museum piece; we wanted a table that wouldn’t threaten our tea. That modesty kept the process honest. No veneer replacement, no fresh lacquer. Just a sticky, reversible hide-glue joint and the patience to let it set.
First inspection — what the joint told us
A careful look at the joint matters more than an instinctive hammer or a strong glue. The mortise and tenon had survived; the tenon showed compressive marks and slight surface checking where the old hide glue had failed. There was no wood rot, no insect galleries, and the seat of the leg fit snugly aside from the loose glue contact. That diagnosis freed us to use a reversible adhesive (hide glue) rather than an irreversible epoxy. Reversibility is the quiet virtue of many old-wood repairs: it allows future adjustment without violence to the piece. The joint’s story was conservative and hopeful, not catastrophic.
Why small repairs matter
There’s a temptation to think repairing is sentimental. But the decision to fix a table is more arithmetic than aesthetics: cost of the repair versus cost of replacement, environmental cost, and the hours required. On paper a new table might be cheaper than a weekend’s labor, but that ignores the thing that matters most in a small rental — the time and space you invest in objects you live with. Repairs enlarge the list of items you already know how to live with. They also teach an economy of care: how to spot a trouble that needs glue, what stops being salvageable, and which tools are worth keeping on the shelf.
Why we reach for hide glue
Hide glue is old-fashioned enough to seem fussy and modern enough to be quietly miraculous. We chose it for three reasons: it adheres wonderfully to end grain, it is reversible with heat and moisture, and it stays kinder to old wood than many modern epoxies. For a 1960s joint that might require future adjustments, the reversibility alone is persuasive: a future owner (or our future selves) can reheat the joint and take it apart without sawing or chiseling. Hide glue also gives a small, fast grab that helps set joints without the full force of clamps. It isn't as strong as modern resins in sheer tensile tests, but for a table leg subjected mostly to compressive and occasional shear loads, it is more than adequate when the fit is correct.
The material comes in granules or as pre-mixed liquid; we used granules dissolved in a tiny copper pot warmed over a double-boiler. The smell is faintly animal and immediately reassuring if you’re a woodworker because it speaks of craft rather than chemistry. The working time is short — hot hide glue gels as it cools — so the procedure favors preparation and paced motions rather than last-minute improvisation. We reheated the glue once during the session, a small act of ritual that focuses attention: measure, heat, spread, assemble.
Reversibility and future repairs
The reversible nature of hide glue isn’t just a quaint talking point. It changes how you approach the repair. You clamp less like you’re building a permanent bond and more like you’re coaxing old surfaces to meet again. If the joint needs redoing, a steam pad will loosen the glue without destroying the wood. That less-violent future matters in rentals and antiques alike: it keeps options open without committing to irreversible substances or damaging heat treatments.
Limitations to know
Hide glue is not a panacea. It requires clean joints and reasonable fits; it doesn’t fill large gaps well. It is moisture-sensitive in the sense that repeated wetting will soften it, so it’s a poor choice for outdoor furniture or for places that will be frequently damp. For our purpose — an interior side table that bears mugs and books — those limitations were acceptable. We accepted the constraint and let it direct the technique: improve the fit more than rely on adhesive fill.
 Save
Save
The tools we used (and what we skipped)
A useful rule for small repairs is: borrow from the kitchen before the workshop. We used a knife, a small plane, sandpaper, a warm towel and, crucially, masking tape as a clamp. What we did not use: a full-size bar clamp, pneumatic tools, or epoxies. Those are excellent tools in their proper contexts; they were simply disproportionate for a single detached leg in a rental living room. The masking tape worked because the joint fit reasonably well and the tape’s tensile resistance distributed holding force across a shallow surface. It is not the same as a professional strap clamp, but it is quieter, accepts slight misalignment, and is much less likely to gouge a patina.
Why masking tape works as a clamp
Masking tape, when used well, exerts a gentle, even pull across a joint. Wrap it several times, twisting each wrap so that it bites into itself and pulls the parts snugly together. Because it’s broad and slightly flexible, it can close gaps without rocking delicate veneers or crushing edges. We covered the tabletop edge with a scrap of cotton to prevent tape stickiness from touching the finish, and it held firmly for the hours we needed. The tape’s advantage is also psychological: it invites small adjustments because it’s simple to remove and reapply, unlike a tightly set metal clamp.
Tools we regret not having on hand
I would have liked a small strap clamp with adjustable tension; it would have made alignment easier for a misbehaving leg. A small set of calipers helped measure the tenon diameter and confirm snugness, but they weren’t essential. For anyone who plans multiple small furniture repairs, a couple of wooden cauls and a strap clamp are a modest investment that saves awkward masking-tape contortions. Still, lack of perfect tools didn’t prevent success; it changed how we paid attention to fit and leverage instead of force.
How we actually glued it
The doing was simple but deliberate. First we cleaned the joint: old brittle glue was scraped away gently with a sharp chisel and a toothbrush soaked in warm water to lift residues. Then we dried the surfaces thoroughly. The hide glue was melted slowly and brought to a light syrup consistency — not so hot as to scorch, but hot enough to remain liquid while we worked. We brushed a thin, even coat into the mortise and onto the tenon, assembled the joint, and used a few turns of masking tape snugged to hold the pieces in register. The whole operation took about twenty minutes from the first scrape to the moment the book settled on the tape as a weight.
Cleaning and surface prep
Most small furniture joins fail because of dirt or brittle old glue, not because the wood is rotten. A sharp scraper, a square-end chisel, and a stiff brush are the right first steps. Take away the old glue until you can see clean wood fibers at the bond surface. Don’t over-sand — you want fresh wood but not a gullet that changes the geometry of the joint. In our case, the tenon needed just a light nip where it had developed a rim; the mortise needed a careful sweep with a dentist’s pick and a toothbrush. Cleanliness equals contact, and contact equals longevity.
Assembly and timing
With hide glue the sequence matters: heat, apply, assemble, clamp, wait. The glue cools and gels quickly, which is an asset because it reduces slide-out. We warmed the tenon briefly in our hands because heat slightly expands the wood and encourages the glue to bond early. After assembly we held the joint with three wraps of masking tape and placed a heavy book flat on the tabletop to deliver steady downward force while the glue cured. Temperature in the room was steady — about 20–22°C — which helped avoid premature cooling that could produce a weak skin on the glue before the joint seated completely.
 Save
Save
Clamping with masking tape and a book — the small geometry of holding
Using tape as a clamp is less theatrical than a bar clamp but very precise when the joint geometry is simple. The tape provides lateral resistance and, when wrapped around multiple times, a surprising compressive force along the joint line. The book acts as a distributed dead weight that keeps the assembled pieces flush without jolting them. The combined system is forgiving: you can slide the tape slightly to correct rotation, lift the book a fraction to re-seat the tenon, and reapply. It’s a low-tech feedback loop that trades brute force for iterative nudges.
How to wrap tape for strength
Start with a protective layer of cloth where the tape meets the finish to avoid sticky residue. Wrap the tape around the leg and tabletop twice, then make a figure-eight twist to increase lateral grip. Each additional layer multiplies the holding force; we used five layers for our joint. Keep the tape’s pulls aligned so tension is vertical rather than diagonal, which helps avoid rotational stress. Finally, tuck the end under itself so you can remove it cleanly minutes after clamping is no longer necessary.
Why a heavy book, not a dumbbell
A heavy book distributes weight evenly across the tabletop, reducing the chance of localized crush marks or rocking. A dumbbell might give more force but concentrates it on a small footprint, which can damage thin tabletops or veneers. A book’s flat surface provides gentle, constant pressure that is ideal for hide glue’s short setting phase. We used a thick art monograph; any heavy, hardbound book will do, as long as its edges are protected by a cloth to avoid scuffing the finish.
 Save
Save
Finishing, patience and six months of small tests
We left visible glue squeeze-out on the seam and removed it after a day with a damp cloth and a light scrape. I did not sand aggressively because I wanted to preserve the table’s aged surface and the repaired joint’s patina. Over the following months we subjected the table to ordinary use — mugs, plants, the occasional laptop — and checked the joint opportunistically. After a week it was firm. After a month there was no creep. At three months it still felt solid under the usual pressure of an elbow or an awkward lamp. Six months later it is the table’s default state: the place you leave a cup and a note.
Aftercare and seasonal changes
Hide glue can weaken if repeatedly exposed to moisture, so we avoid piling damp dishes directly on the repaired area and use coasters. Seasonal humidity in Lisbon is mild, but in winter the apartment is drier; the joint actually tightened slightly during a dry spell because the glue contracts a hair. It’s useful to check older repairs when seasons turn: a little seasonal attention prevents surprises. If a joint shows a tiny movement one season and tightness the next, that is normal; if it fails under normal use, that’s when you consider reinforcing or disassembling.
When to re-glue versus reinforce
If a joint fails because of repeated shock or because the tenon is deeply chewed, reinforcement with a spline or a peg may be necessary. For our table, the cause was simply old glue and minor surface compression. Re-gluing was the right response. Reinforcement is heavier-handed and permanent; re-gluing preserves the original join geometry and remains reversible. If you foresee rougher use — frequent moves, heavy loads — reinforcement can be wise. But for everyday domestic life, a well-made hide-glue repair is reliable and very quiet.
- Clean the joint thoroughly — scrape off brittle old glue and dry the surfaces.
- Heat and mix hide-glue granules to a syrupy consistency; keep it warm while you work.
- Brush glue into both mortise and tenon, assemble, and align quickly.
- Wrap masking tape tightly and place a flat heavy book for steady pressure until set.
“Mending asks for attention, not perfection.” — Theo
What the repair taught us about living with things
The most surprising lesson was social rather than technical: repairing alters how you relate to an object. After the fix, the table felt less like a commodity and more like an ingredient in our everyday routines. There’s a psychological return on small acts of care; they make space for likelihoods — leaving a library book mid-read, placing a plant to trial a new light angle, stacking keys without worrying. Repair stops the economy of instant disposal and creates a slow accumulation of decisions that shape how a home functions. It’s not high-mindedness, simply a better use of the hours we have.
The small craft of habit
Doing small repairs builds a local skillset. Each success makes the next fix less mysterious and less costly. We now notice small loosenings earlier and have a sense of the minimal intervention needed. That attentiveness changes shopping habits too: replacements must clear a higher bar. It’s a gentle form of domestic competence that rewards curiosity more than consumption.
When not to fix
There are times when repair is false economy: when structural damage is severe, when replacement parts are unavailable, or when a piece is unsafe. We would not have re-glued a leg if the tenon had been hollowed out or the wood rotten; that calls for rebuilding or replacement. Repair should be an honest assessment, not a stubborn refusal to discard. In our case it was a clear fit: the problem was glue, not timber.
 Save
Save
This repair was small and unglamorous, but it changed what the table did for us. It’s easy to undervalue the surfaces in a home — they’re not architecture, they are interface: the place where the living room meets the life you live inside it. Fixing a table leg is like restoring a hinge on a door: invisible until it fails, then suddenly vital. We’ve kept the glue pot on the shelf since that Tuesday, not because we expect every object to fail but because mending takes less time than replacing and gives a different kind of satisfaction.
How to do it
Clean the joint
Remove old brittle glue and dirt from the mortise and tenon using a sharp chisel, toothbrush and warm water. Dry thoroughly before gluing.
Prepare the hide glue
Melt hide-glue granules in a small pot over a double-boiler until syrupy and homogenous. Keep it warm; reheating is okay if it cools.
Apply and assemble
Brush a thin, even layer of glue into both surfaces, insert the tenon, align the joint and rotate slightly to spread the glue evenly.
Clamp and wait
Wrap masking tape tightly in several layers around the joint, place a flat heavy book on top for steady pressure, and leave until the glue is set (several hours).
Frequently asked
Will hide glue hold better than modern wood glue?
Can you use masking tape as a clamp for all repairs?
How long should I wait before using the table again?
Is hide glue safe to use in a rental where modifications are restricted?
In closing
If there’s a single rule the table left behind, it is this: do the smallest sensible repair first. The leg didn’t require a new table, a professional’s clamp set, or hours of angst. It required paying attention, a tidy pot of hide glue, some cloth-backed masking tape and patience. Mending is a narrow, practical generosity toward the objects that live with you; it says you prefer presence over perfection. That choice changes how the room feels — less curated display and more accumulation of useful history. In a 740-square-foot rental, where every surface earns its keep, that repaired leg is a small rebellion against replaceability. It holds up a cup, a book, a lamp and a way of seeing: practical care as a quiet design decision.