The shelf is twelve centimetres deep because that was the only spare piece of oak left after Theo cut the legs for a bedside table. On a Sunday morning I stood on a step ladder with a feather duster and felt more pleased than seems reasonable for a single plank. The little ceramic cup Mira’s grandmother posted from the Algarve sits beside a smoked‑paprika jar; both seem important now in a way they didn’t the day they arrived. Strangers who visit take a photo of that ledge rather than the sofa. It is tiny, stubbornly specific, and an odd thing to tie so many small domestic pleasures to, but then most good furniture decisions are about restraint and the right gap between things.
The ledge itself: why twelve centimetres
Twelve centimetres — or about five inches — felt almost comically narrow when we first mocked up the idea on cardboard. It arrived as an economy decision: a leftover plank saved us the trip to the hardware store and the shelf was never meant to hold more than a few jars. What surprised us was how much the narrow depth disciplined everything else. Lidded spice jars sit neatly in a single row, a small ceramic becomes a miniature still life instead of getting lost among bowls, and the whole composition resists the temptation to clutter. In a small kitchen, shallow becomes an aesthetic choice as much as a spatial one, a way of forcing generosity through limitation rather than accumulation.
The narrowness also influenced practical matters: the shelf needed to be absolutely flat, with no wobble, because a slight tilt turns a neat row into a cascade. We learned this the slow way — a jar of cumin rolled the first week and landed on the window sill. Fixing that wobble cost more time (and sanding) than the shelf itself did. The small depth meant no tall objects, which in turn encouraged us to make every object count. What remained was a tidy vignette that read as intentional, which is the quieter form of a design win.
Keeping the ledge shallow changed how we shop for jars. Rather than chasing larger, air‑tight canisters, we started buying short, wide spice jars that show off the contents — the paprika looks more like a red-orange stripe than a lump in the back of a cupboard. The constraint forced a small choreography: the front row is for ingredients we reach for three times a week; everything else lives beneath the sink. That kind of daily triage doesn’t just tidy a shelf; it clarifies what gets cooked and what doesn’t.
What shallow depth asks of objects
Shallow shelves privilege presence. Objects must be short, visually compelling, and useful. That changed our thrift-hunting: instead of a tall mid-century jar we once coveted, we bought three squat glass jars that displayed three different colours of salt. The result is a compositional clarity — bands of colour, repeating textures, a rhythm across the ledge. In practical terms, the shallow depth reduces the chance of spills and makes dusting faster. It’s the sort of choice that feels petty until the moment it becomes habit; then it seems obvious.
How the depth aligned with our rental constraints
In a 740 sq ft rental, wall space is political. A narrow shelf keeps the window frame readable and avoids punching new holes for large, heavy furniture. Landlords tend to tolerate a few small fixings more than anything structural; a shallow oak shelf looks light and reversible. We documented the anchors and kept the original screws in a labelled envelope in the kitchen drawer — a small bureaucratic gesture that made the minor alteration feel respectful. The depth allowed us to promise, in good conscience, that we weren’t changing the apartment’s character.
Decision 1: cantilever versus visible brackets
The first real argument involved the mount. Visible brackets are honest and utilitarian; cantilevers make the wood look like it floats. In photographs a bracketed shelf reads workmanlike, which is fine in a workshop but not in a tiny kitchen that doubles as our living room. We wanted the ledge to feel like a frame for the window rather than an add‑on. That nudged us toward a hidden, recessed support. The decision meant a little extra work — routing the back of the board, lining up the metal sleeve — but the final silence of the support was worth it. The oak seems lighter and the objects appear to hover rather than sit.
A cantilever also tightened our tolerance for precision. A hidden support exposes any inaccuracy. The first time Theo attempted the recess, the sleeve sat a millimetre proud and the shelf rocked. We re-cut, sanded, and re-drilled; the fixes ate a morning. That afternoon the shelf sat true, and the little improvement paid dividends. Choosing a concealed mount is a small moral about craft: the absence of visible hardware spotlights the hand that made it. It demands better joins, better measurement, and a willingness to re-do small mistakes.
There are moments when brackets are simply the pragmatic choice: if the wall is hollow or you need a deeper load-bearing shelf, visible supports are sensible and charming. For our purposes — a narrow shelf primarily holding glass jars and one ceramic cup — the cantilever felt like the right austerity. The trade-off was time and a small cost for a sleeve and proper anchors, but those consumables were cheaper than a bespoke bracket and aesthetically quieter. In a rental, the low visual noise of a hidden mount felt kinder to the room’s proportions.
When a cantilever makes sense
A cantilever is a good fit when the shelf is shallow, the load is light and distributed, and the wall behind is sound enough to take a threaded sleeve. It creates the visual effect of objects floating, which suits small rooms where vertical clutter quickly appears heavy. The technical caveat: the sleeve and anchor must match the wall composition; a brick wall needs different hardware than a plasterboard one. For us, the cost of the sleeve and anchors was under €10 but the time to get the alignment right was the real expense.
When visible brackets win
Visible brackets are faster to install, more forgiving of small errors, and often cheaper if you already have a pair at home. They also bring their own aesthetic: a chunky black iron bracket reads like a detail from a 1950s apartment, which can be delightful if that’s the house’s voice. We didn’t choose brackets because our goal was to keep the shelf visually light, but for someone who prefers honest hardware and quick installation, brackets are the correct, practical answer.
 Save
Save
Decision 2: oak or a softer wood like pine
We chose oak because we wanted the shelf to read as an object, not merely storage. Oak’s grain has a presence that punishes sloppy cuts but rewards careful finishing; pine hides mistakes at first but ages into a look that can feel childish if not handled. The oak we used was a second‑grade board bought from a local timber yard for about €25, with a knot near the end that added character. Its weight felt reassuring on the wall and its darker tone contrasted the limewashed paint. Choosing oak was partly aesthetic and partly about how the wood would patina with hands passing over it over the years.
There was a practical side too. Oak is harder; it resists dings from jars and is less likely to dent if a tin slides. That said, harder wood demands better screw placement because splitting is a real risk, especially near ends. We pre‑drilled carefully and used stainless steel screws counter‑sunk and filled with matching beeswax later. Pine would have been quicker to cut, cheaper, and kinder to tools, but the long view — how the shelf would look after many Sunday dustings and the occasional plant spill — tipped us toward oak.
We did consider alternatives: reclaimed fir for a textured look and walnut for drama. Reclaimed timber comes with charm but also hidden repairs, which felt unnecessary for this small ledge. Walnut was beautiful but expensive and visually heavy for our pale kitchen. Oak landed in a middle ground — not flashy, but honest and durable. The decision felt more like choosing the sentence that set the paragraph’s tone rather than an isolated flourish. Once the oak was in place it anchored the composition; the jars and cup seemed to belong to it rather than the wall.
Cost and care for oak in a small project
The oak board cost about €25; screws, anchors and a metal sleeve added another €12. Sandpaper, beeswax, and a small tin of finish were another €15. So the total project cost under €60, excluding tools. Maintenance has been minimal: an annual light re‑rub of beeswax keeps fingerprints at bay and the surface smooth for jars. When shopping for oak, watch out for cupping; a straight, dry board is worth the extra euro. In a short project the material cost is small, but a poor choice can make the shelf look tired quickly.
Why softer woods were tempting
Pine and other softwoods are quicker to work and often cheaper, which makes them attractive for weekend projects. They accept paint well, which is useful if the owner prefers to blend the shelf into the wall. We nearly painted the oak at one point; then Theo sanded it and we decided the grain was worth keeping. Softwoods are forgiving for mistakes and kinder to beginners’ tools, but for an object meant to be seen every day a harder wood felt like a way to make a modest piece look intentional rather than improvised.
Decision 3: the beeswax finish and why we left it dark
Finishes are where the personality of a board gets decided. We tried oil first; it made the oak richer but felt too glossy for the kitchen’s matte limewash. Beeswax, rubbed in several thin coats and buffed, produced a low sheen that speaks of the handmade without shouting. We darkened it slightly with a touch of walnut oil in the mix to deepen the tone and make the oak harmonise with the old sill beneath the window. The dark beeswax stopped the shelf from reading like a new insert and tied it to the apartment’s existing patina.
A darker finish changes how dust shows and how fingerprints read. We were nervous that a dark beeswax would require constant polishing, but the opposite happened: the finish hides small scuffs and asks for less obsessive upkeep than a pale, bare board. The beeswax also has the practical benefit of making glass jars slide more predictably, reducing the risk of a jar nudging another. The small cost (a tin of beeswax and oil was €12) felt like a useful investment in how the shelf would age and how often we’d have to fuss with it.
There is a quieter argument against dark finishes: they can read heavy and make a small space feel closed in if overused. We avoided that by limiting the darkness and keeping the rest of the kitchen pale. The beeswax’s warmth reads in photos as restraint rather than drama; it suggests age rather than trend. Choosing a finish is part aesthetic and part temperament. We wanted something that would sit patiently, get marked by life, and look better for it.
How we applied the finish
We sanded to 180 grit, wiped the dust with a tack cloth, and applied thin layers of melted beeswax warmed with a little walnut oil. Each pass was cloth-rubbed, allowed to cool, then buffed. Two coats gave a soft sheen; a third sealed the surface without gloss. The application is forgiving but benefits from patience: thick layers pool and look blotchy. The whole job took an afternoon and cost less than a night out. The small ritual of the finish — heat, rub, buff — mirrors the slow living ethic that governs the rest of the apartment.
Maintenance and touch-ups
Beeswax needs occasional reapplication — once a year or when the surface looks dry. For small nicks we simply rub a bit of warmed wax into the mark and buff. The wax also acts as a mild antiseptic barrier against spills; oil will penetrate more and can darken spots permanently. We’ve found that the beeswax keeps the wood looking lived‑in but well cared-for, which suits the apartment’s slow rhythm. If someone prefers no maintenance, a factory polyurethane is an alternative, but it reads different: less hand, more factory.
Decision 4: the gap between shelf and window frame
We thought about putting the shelf flush against the top of the window frame, but the builder in us resisted. A small gap — we settled on 1.5 centimetres — creates a breathing room that reads as deliberate. Too tight and the shelf reads like a retrofit; too high and it looks like a floating mantel that interrupts the window’s silhouette. The gap lets light graze the underside of the shelf, producing a soft line that highlights the oak’s edge without making the wood scream for attention. This tiny space changes how shadows and objects interact with the window throughout the day.
Practical reasons nudged the gap too. The window’s operation required a small clearance so curtains and roller blinds could move freely. We also wanted a place where a thin strip of dust wouldn’t gather unseen; a visible gap makes the act of cleaning part of Sunday ritual rather than a problem to ignore. The decision about spacing is less architectural and more choreographic: it decides whether the shelf will be used and maintained or forgotten and left to collect dust in a way that feels like neglect rather than charm.
Measuring for the gap required clamping and a pair of eyes. A wooden shim held the shelf at the chosen distance while we squared it; a tiny misalignment was visible from the kitchen table and had to be corrected. The ritual of measuring, clamping, re-measuring is irritating in the moment but pays off every time someone notices the ledge and says, 'that fits perfectly.' The gap is an argument about attention: a small, patient choice that signals care rather than haste.
How light uses the gap
The narrow gap allows a sliver of underside highlight in morning and evening, which softens the shelf’s silhouette and reads as a deliberate architectural detail in photographs. The light falling there changes with the seasons, sometimes emphasizing the oak’s medullary rays and sometimes flattening them into a honeyed band. That subtle, changing line lends the shelf a quiet temporal quality: it’s not the same block of wood every day, but a small stage for light and objects to perform on.
Practicalities of installation with a gap
To maintain a consistent gap we used thin wooden shims and clamps while driving the sleeve into the wall. A level is essential; eyeballing will betray you quickly. The depth of plaster and the squareness of the frame dictated minor adjustments; the first attempt left the shelf slightly off, which required de-installing and re-scribing the sleeve location. These small re-dos are humbling but part of the craft. The payoff is a clean, even shadow and a shelf that looks like it belongs rather than a hurried add-on.
Decision 5: lighting — natural, reflected, and a small LED
We relied on the window first: morning light and a flush of late afternoon that makes the oak glow. But the shelf also needed to be useful at dusk when the apartment fills with the kind of soft electric light that flattens colour. A hidden, warm LED strip under the shelf seemed like overkill until we tried one on a rainy evening and could see the labels in the steam of a pot. We chose a warm 2700K strip with dimmable output, installed it so the bulbs are concealed and the glow is indirect. The light reads as considerate rather than theatrical.
The LED also solved a photographic itch: the shelf often appears in evening photos and the strip gives the jars a subtle rim that looks pleasing in small images shared to friends. We clipped the wiring behind the trim and routed it to a plug in the cabinet below, keeping the installation reversible. The small light has become part of the shelf’s ritual: it comes on when dinner starts and stays off otherwise. Lighting decisions are rarely about brightness alone; they shape the moments a space holds.
We rejected a small pendant that would have drawn attention upward and argued with the window. The shelf is meant to frame the window, not compete with it. The LED wins because it is subordinate, practical, and kind to photography. It also reduces the temptation to overcrowd: a brightly lit shelf invites display; a gently lit one invites restraint. Small lighting choices like this one change how often we use an object because they change the mood the object creates.
Wiring discreetly in a rental
Running a thin cable behind a trim strip and plugging into a nearby socket is reversible and easily hidden. We used adhesive cable channels painted the wall colour where needed and avoided hard wiring anything into the property. The LED strip’s controller hides inside the cabinet and the cable is held with small, removable clamps. This method keeps the landlord content and our electrician bill non-existent. It’s the kind of 'good neighbour' solution that keeps small improvements pleasant instead of problematic.
How light changes what we place on the shelf
Warm, indirect light encourages transparency: glass and ceramics look friendly, not fetishised. We stopped placing tarnished metal tins there because the LED accentuated scratches. Instead, clear jars and a single glazed cup now sit in the lit composition. The lighting choice subtly curates objects: those that photograph well under warm light tend to stay, and those that look flat move to another shelf. Lighting, in short, was one of the decisions that did the curating for us.
 Save
Save
Decision 6: the palette of jars and why colour mattered
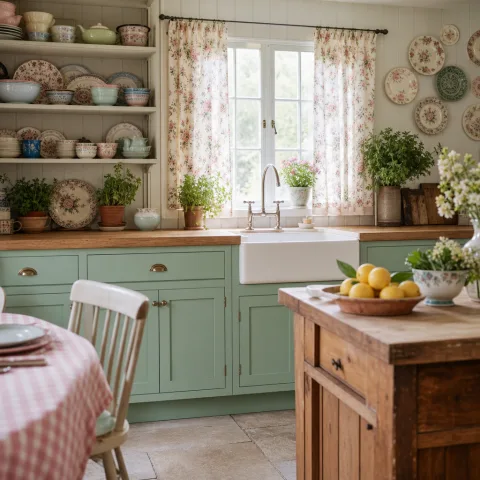
We experimented with two approaches: matching jars and eclectic thrifted vessels. The matching approach looks tidy and modern; the mismatched thrifted route has the humanising quality of things collected over time. We found a middle ground: short, squat glass jars with matching lids for spices, and one or two sentimental ceramics (like Mira’s grandmother’s cup) to break the rhythm. The consistent form keeps the line readable in photos; the odd ceramic or a little green plant gives the ledge a pulse. Colour decisions like this are less about theory and more about what you’ll live with daily.
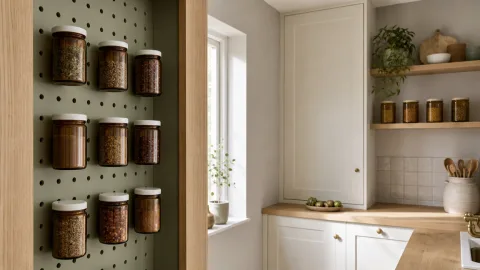
We chose clear glass because it foregrounds contents — turmeric becomes a deliberate orange blot in the row and dried oregano reads as a field of tiny leaves. Labels were handwritten on kraft paper with a fountain pen; uniform typography would have been too formal. Colour emerges through contents rather than the container, which felt truer to our cooking: spices are used, not merely displayed. The jars’ palette is therefore seasonal and edible; it changes as we refill them and as markets offer different things across the year.
We avoided bright enamel tins and loud plastics because the shelf reads as a visual paragraph; a single shouty object would pull the sentence out of balance. That left space for the small ceramic to act as a punctuation mark — its glaze and tiny imperfection become the human detail the shelf needs. Colour, when reduced and thoughtful, becomes a quiet actor: it unites the composition rather than competing with it.
Labeling and legibility
Handwritten kraft labels are legible from arm’s reach and add warmth. We tested printed labels and they looked too clinical for the kitchen’s temperament. The handwriting commits us to a modest ritual: when a jar is refilled, the label is updated and feels like a small act of maintenance. Legibility is practical, aesthetic, and ritualistic: it helps cook quickly and keeps the shelf from becoming a static photograph rather than a working tool.
When to introduce colour accents
A single accent — a hand-painted jar, a green sprig, a ceramic — suffices. Colour should be used sparingly on such a narrow shelf; a red tin or bright blue bottle will dominate and make the composition feel like an advert. Instead, a single accent placed off-centre offers a focal point. Over time we rotate that accent with the seasons: citrus in winter, a small basil in summer. The change keeps the shelf alive without encouraging clutter.
 Save
Save
Decision 7: what we decided not to put on the shelf
Perhaps the most consequential decision was negative: what to leave off. We excluded mugs, tall bottles, recipe books, and anything that reads like storage rather than display. That restraint was strategic: by limiting the shelf to things that either photograph well or are used every few days, we kept it from becoming a catchall. The narrow depth helped enforce this, but the conscious decision to leave objects off — to tolerate less visible storage — created the shelf’s quiet dignity. It asks for curation rather than accumulation.
We resisted the temptation to use the ledge for plants that trail heavily. A heavy pot would have overwhelmed the shallow board and risked water marks. Instead, a single small trailing plant in a lightweight clay pot sits at one end, and a small seasonal sprig gets swapped weekly. Similarly, we decided against a line of mismatched ceramics collected over time; the shelf reads better with fewer, thoughtfully chosen objects than with a museum of miscellany. Leaving things off felt like a kindness to the room.
This choice — omission as design — is an argument against the 'use every surface' instinct. We reserve other shelves and the inside of a cupboard for overflow. The visible shelf is for what matters: gestures, small tools, and a little ornament that means something. It became a place where rituals happen: coffee in the morning, a spoon set down after stirring, a sprig moved to the table for dinner. The shelf thrives because we decided not to treat it as an extra cupboard.
 Save
Save
The modest toolkit and a short list of materials
The project required a small set of tools you might already own: a hand drill (or driver), drill bits sized for the sleeve and screws, a router or a chisel to recess the sleeve, sandpaper up to 180 grit, a cloth for wax, clamps, a level, and a tape measure. We used a simple pocket router to cut the recess; a careful chisel job would do just as well. The sleeve needs to be the correct diameter for the load and the wall type; measure twice, order the sleeve once. A small investment in a good anchor pays back every time the shelf sits true.
- Quarter-sawn oak board, 12 cm deep, length to fit window
- Metal sleeve and stainless anchors sized to your wall
- Short, squat glass spice jars with cork lids
- Beeswax and walnut oil for finish
- Warm (2700K) LED strip with diffuser and adhesive channel
- Sandpaper (80–180 grit), clamps, level, drill and bits
“The right small object makes an ordinary routine feel like a ritual.” — Mira
How to do it
Measure and mark the sleeve location
Carefully measure the desired gap above the window and mark the wall centre. Use a level and clamps to ensure the sleeve will be perfectly horizontal before cutting or drilling.
Prepare the oak board
Route or chisel a recess in the back of the board for the sleeve so it sits flush. Sand the board progressively up to 180 grit and clean the dust with a tack cloth.
Install the sleeve and anchors
Drill the wall for the sleeve and insert the metal sleeve with the appropriate anchors for your wall type. Ensure the sleeve is fully seated and level before proceeding.
Mount the shelf and seal with beeswax
Slide the board onto the sleeve, check alignment, then fix it with the recommended screw. Apply thin coats of beeswax mixed with a little oil, letting each cool and buffing between coats.
Frequently asked
Will a narrow shelf hold heavy jars or pots?
Can I install a similar shelf in plasterboard walls?
How do I keep the beeswax finish looking good?
Is a hidden cantilever reversible in a rental?
In closing
If there is a single rule that holds the shelf together it is this: decide one thing and live with it for a season. The seven choices we made were small — wood, finish, lighting, spacing, mount, colour, restraint — but each interacts with the others like threads in a handwoven cloth. The shelf is useful, yes, but what makes it matter is how it frames small rituals: stirring a pot, reaching for oregano, swapping a jar for a seasonal flower. Leave some of the surface empty on purpose. The blankness lets the rest speak. In our 740 sq ft rental, a little ledge taught us that precise smallness often reads as generosity.